CadVex user guide · Chapter 3
Set up your shop
CadVex prices every part with your rates, on your machines, from your stock. Set these once in Settings and every new analysis starts from them.
A new CadVex account starts with demo values: a fictional material catalog, common stock sizes, sample rates and a demo letterhead. They let you try CadVex at once, but they are not your shop. Replace them before you rely on an estimate.
Where the settings are
Click Settings in the left menu. The tabs are:
| Tab | Cloud | Desktop | What it holds |
|---|---|---|---|
| My Account | ✓ | License, this computer, sign out. | |
| Billing | ✓ | ✓ | Your plan and payments. |
| My Profile | ✓ | ✓ | Your details, your shop details, currency, language, units. |
| Shop Rates | ✓ | ✓ | Rate profiles, machine types in your shop, markup. |
| Machines | ✓ | ✓ | The machines of your shop, each with its size, rate and speed. |
| Materials & Stock Sizes | ✓ | ✓ | Your materials and the stock you buy. |
| Quote Template | ✓ | ✓ | Your letterhead PDF and where the fields go. |
| Team | ✓ | Invite your colleagues. | |
| Delete Shop Data | ✓ | Erase all RFQs, parts and quotes. | |
| Backup & Storage | ✓ | Backups and disk space. | |
| Updates | ✓ | New versions of Desktop. |
In Cloud, shop settings are shared by your whole team, and only an administrator can change them. Other members see them read-only.
Currency, language and units
Open Settings → My Profile.
- My Details: your name, job title and phone number.
- Shop Details: your shop name, legal name, contact details, tax or VAT number and address, plus:
- Default currency. Every price and quote uses it. Set it first: CadVex asks for it before your first part.
- Language: English or Français. The change applies at once.
- Units: Metric (mm, g) or Imperial (in, lb).
Click Save Shop Details when you are done.
CadVex does not convert amounts from one currency to another. Analyses and quotes you saved keep the currency they were priced in; new ones use the new currency. In Cloud, My Profile says so before you save.
In Desktop, changing the currency asks you to confirm first: "Change currency from … to …?" You choose what happens to your rates and other money values:
- Change currency and reset monetary defaults puts the rates back to CadVex's recommended values for the new currency and keeps the machines' own rates. It is offered only for euros, the one currency CadVex has recommended rates for,
- Change currency and keep current values keeps the same numbers, now read in the new currency,
- Cancel keeps the old currency.
After a change without recommended rates, enter your rates in Settings → Shop Rates and Settings → Machines before you quote.
Hourly rates
Open Settings → Shop Rates. Your rates live in a rate profile. Most shops need one; you can keep several, for example a standard profile and a profile for a large customer.
- New Profile, Duplicate, Rename, Save Profile and Delete manage the profiles.
- Set as Default chooses the profile every new analysis starts from.
A profile has these sections:
| Section | What you set |
|---|---|
| Basic Info | The profile name and notes. |
| Machines in your shop | The machine types you have. See below. |
| Machining Productivity | How fast your machines cut each material. Leave it as it is unless you know your shop's real cutting rates. |
| Machine Rates | Hourly rate for the 3-axis mill, CNC lathe, turn-mill, 4-axis mill and 5-axis mill. A machine you add in Settings → Machines can have its own rate, which then replaces its type's rate. |
| Support Rates | Hourly rate for setup and programming, and for deburring and inspection. |
| Quantity Defaults | Scrap rate, minimum lot charge and minimum material charge. |
| Markup | Material markup, general markup, and the low and high range shown around each estimate. |
Setup time and first-article inspection are not shop settings. Every analysis carries them as lines of its machining plan: Setup & fixturing in each setup and First-article inspection under Job (one-time). Change them there, or in step 7 Setup & Quantity of Cost Analysis. A profile saved by an older version of CadVex may still hold those two values; they are ignored.
Click Save Profile after your changes.
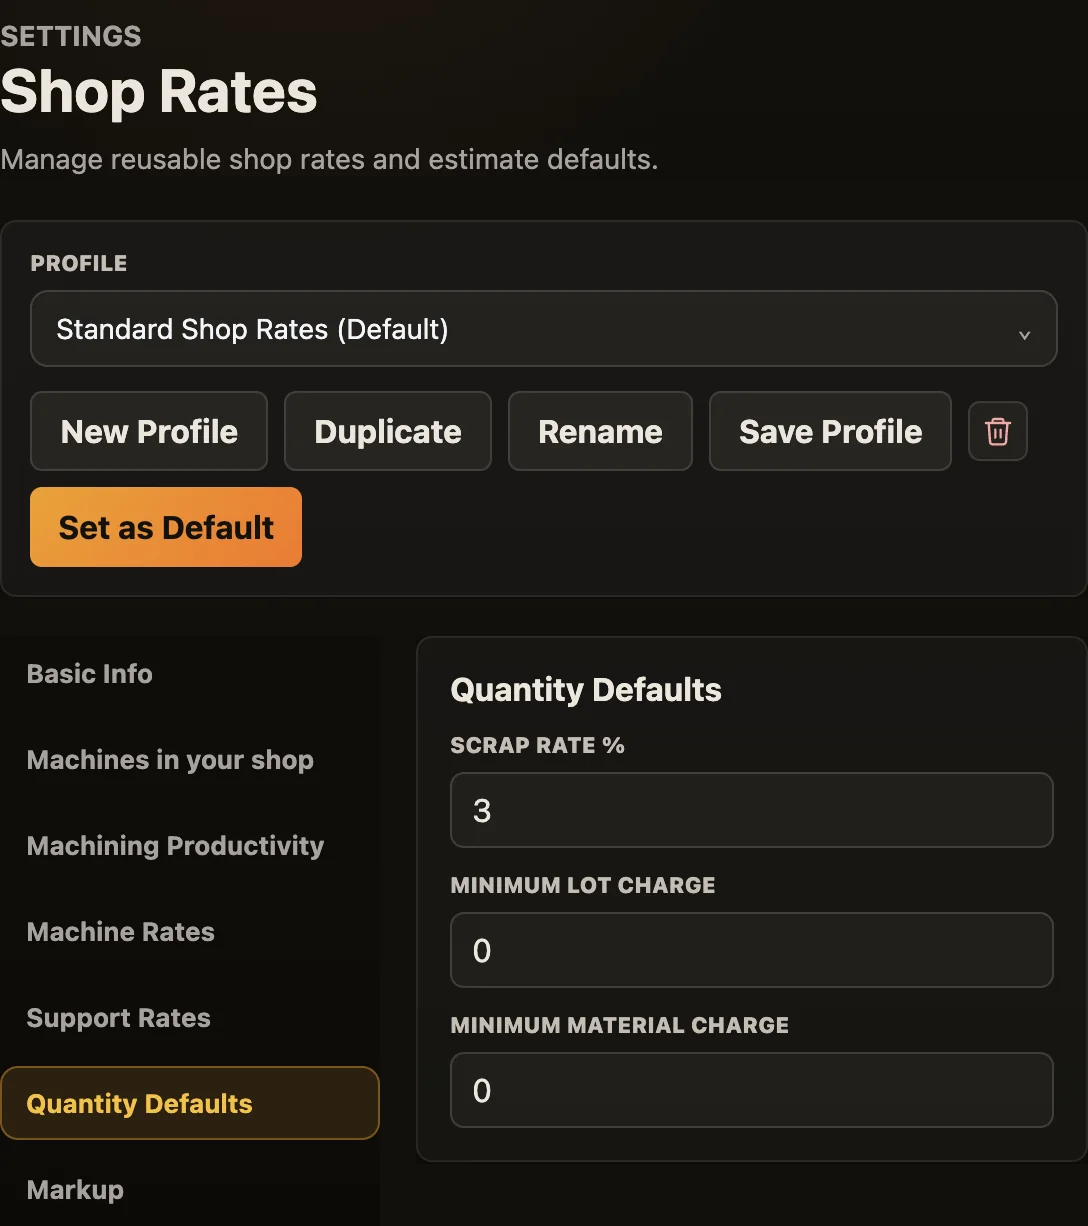
Machines in your shop
In Shop Rates → Machines in your shop, tick the machine types you have:
- 3-axis mill
- 4-axis (rotary)
- 5-axis (3+2)
- CNC lathe
- Turn-mill / live tooling
CadVex prices a part only on routes these machines can run. A cheaper route on a machine you do not have is shown as information, never used as the price. See Routes and quantities.
Until you save this list, CadVex assumes your shop has every machine type. A banner reminds you: "CadVex currently assumes your shop has every machine type…". Click Set up machines to fill it in, or Not now to hide the banner. Saving a list of your own machines (see below) answers the question too, and the banner goes.
Once you have saved your machines, your machines decide: the five boxes show them, read-only, with the note "Your machines decide these (Settings → Machines): a machine type with no available machine there gets no route. Add or remove machines there."
Add your machines
Open Settings → Machines. This is the list of the machines in your shop: one list for the whole shop, shared by every rate profile. CadVex gives each setup of a part one of your machines. The part has to fit it, and the machine's rate and speed price that setup.
Until you add your machines, CadVex uses one generic machine for each machine type your shop has, at that type's rate, so new analyses are priced as before. One difference: on a part made on a lathe and a mill, the work cut in a mill setup is now priced at the mill rate. Saved analyses keep their price. The page says so: "You have not added your machines yet: …".
The page has one block for each machine type: 3-axis mill, 4-axis (rotary), 5-axis (3+2), CNC lathe, turn-mill / live tooling and Swiss-type lathe.
Add a machine from the catalog
- Click Add machine in the block of its type.
- Type the brand or model, for example "Haas VF-2", and pick it in the list. CadVex's catalog holds about 1,000 machine models with their sizes. If yours is not there, choose Other / not listed and fill in the form by hand.
- Check the form. A size from the catalog says "From the catalog"; change it if your machine differs.
- Click Add machine in the form, then Save machines at the bottom of the page.
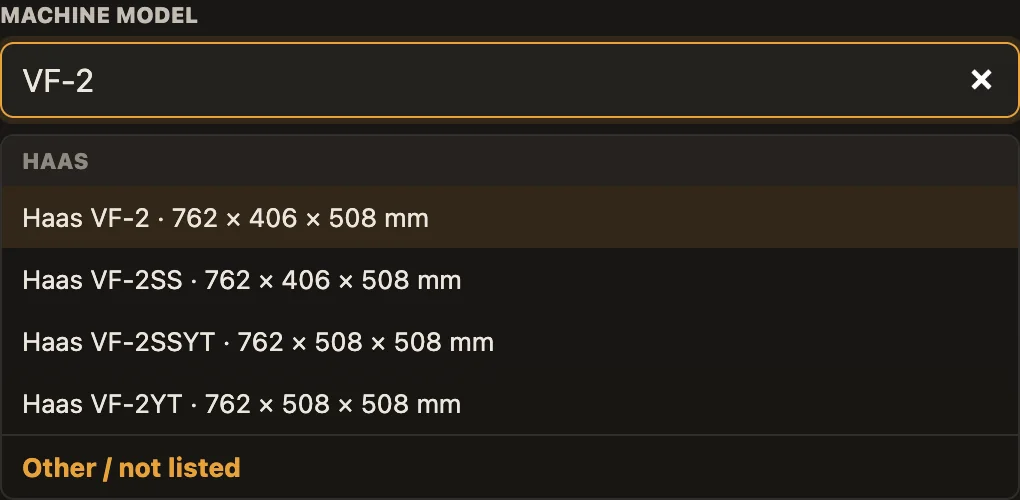
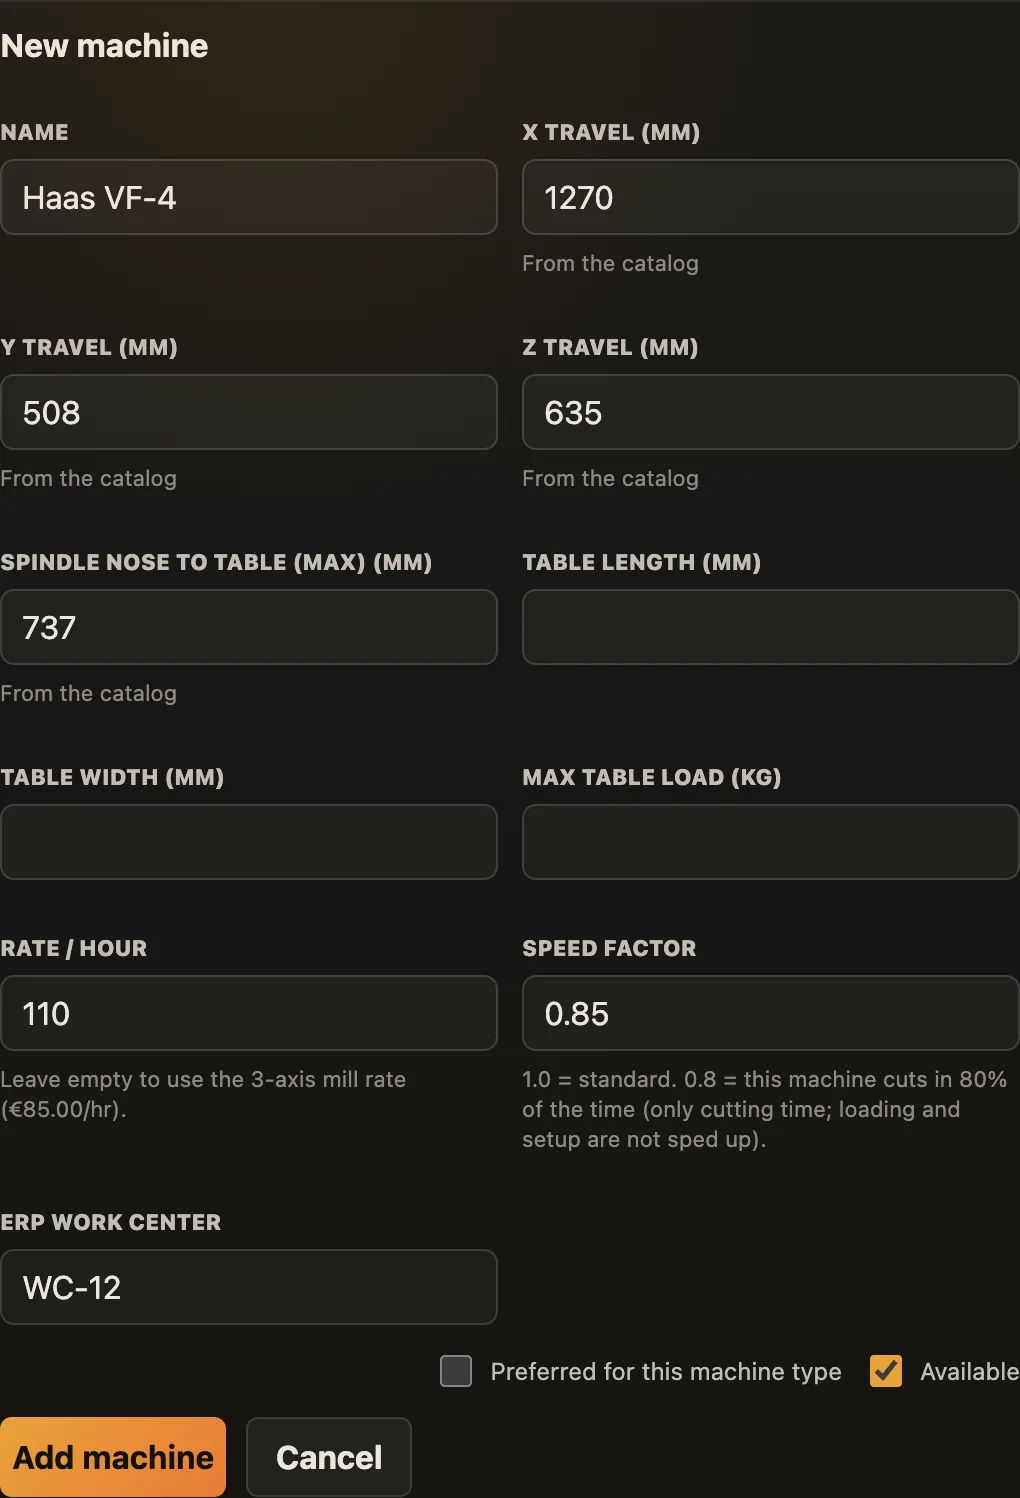
For each machine you can set:
| Field | What it does |
|---|---|
| Name | The name shown in the plan, for example "Haas VF-4". |
| Sizes | Travels, table, turning size or bar capacity, depending on the type. CadVex uses them to check that the part fits. |
| Rate / hour | The machine's own hourly rate. Leave it empty to use the rate of its machine type from Shop Rates. |
| Speed factor | 1.0 is standard. 0.8 means the machine cuts in 80% of the time. It changes cutting minutes only: loading and unloading, setup, programming and inspection are not sped up. |
| ERP work center | Your own code for the machine. It shows in the plan and in the exports. |
| Preferred | The machine of its type CadVex tries first. |
| Available | Untick it to keep a machine in the list but out of use. |
A machine whose size is not set is never chosen automatically. The form marks the sizes it needs ("Size not set for this machine"), and you can still choose the machine by hand in the Machining Plan.
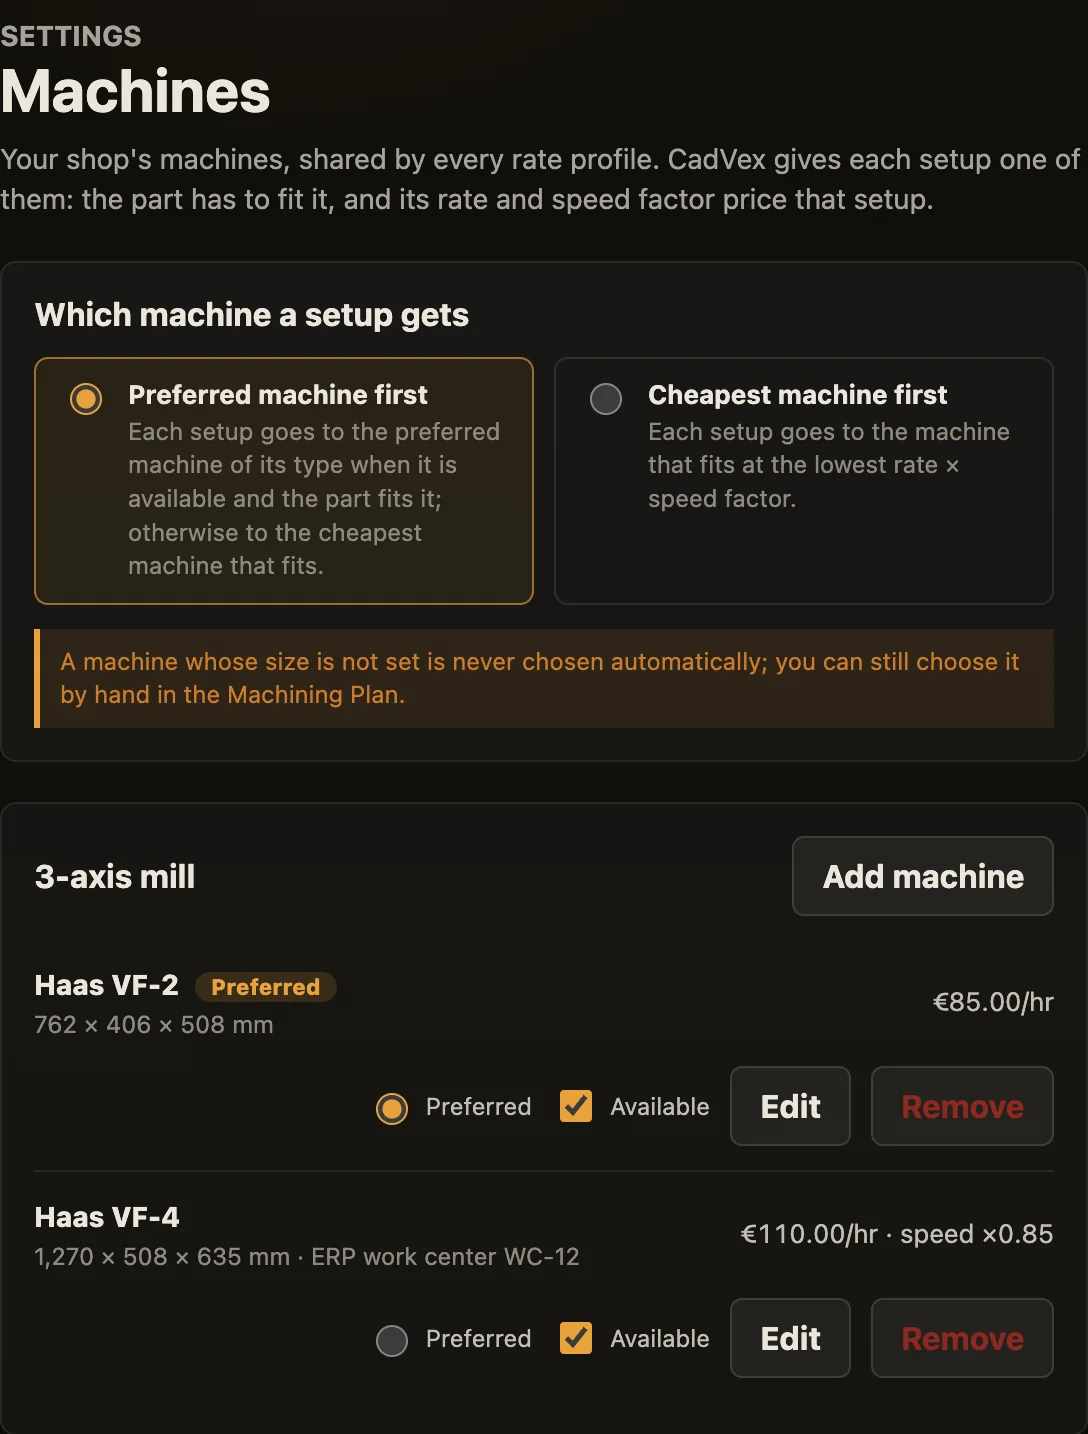
Which machine a setup gets
At the top of the page, choose the rule:
- Preferred machine first: each setup goes to the preferred machine of its type when it is available and the part fits it; otherwise to the cheapest machine that fits. This is the default.
- Cheapest machine first: each setup goes to the machine that fits at the lowest rate, speed factor included.
What your machines decide
- Routes. Once you have saved your machines, a machine type with no available machine in your list gets no route. A route is priced when every machine it needs has a rate: its own, or the rate of its type in Shop Rates. See Routes and quantities.
- Prices. The setup is priced at its machine's rate and speed. With only generic machines, prices are the same as before, except on lathe-and-mill parts, where the work cut in a mill setup is priced at the mill rate.
- New analyses only. Each new analysis copies your list. Changing the list never changes a saved analysis or its price: "Saved your machines. New analyses use them; saved analyses keep their prices." Removing a machine does not either: analyses already saved keep the machine they used.
- Your edits are safe. If you leave the page with changes that are not saved, CadVex asks first. If your machines cannot be loaded, the page says so and offers Try again instead of showing an empty list that a save would replace.
- Cloud: only an administrator can change the list; other members see it read-only.
Materials
Open Settings → Materials & Stock Sizes and choose Materials.
- CadVex Material Library gives you common engineering materials. Untick Include CadVex material library to hide them; this does not delete them.
- Shop Material Catalog holds your own materials, with your prices. Click + Add Material, enter the name and choose an engineering profile: the CadVex material your grade behaves like. CadVex needs the profile to estimate cutting time.
A material marked Needs mapping can be saved, but cannot be used for quoting until you choose its engineering profile.
Stock sizes
Choose Stock Sizes in the same tab.
- Use CadVex standard stock sizes gives practical starting sizes.
- Shop Stock Sizes holds the bar, plate and tube you actually buy. Click + Add Stock and enter the form and dimensions.
CadVex matches sizes by form and dimensions, whatever the material. It picks the smallest size the part fits in, and prefers your shop sizes over the CadVex sizes when they are equivalent. A round bar is chosen only when the whole cross-section of the part fits inside the bar, so a square block is never priced from a bar too thin to hold its corners.
Import materials or stock from a spreadsheet
You can load your list from Excel or CSV instead of typing it.
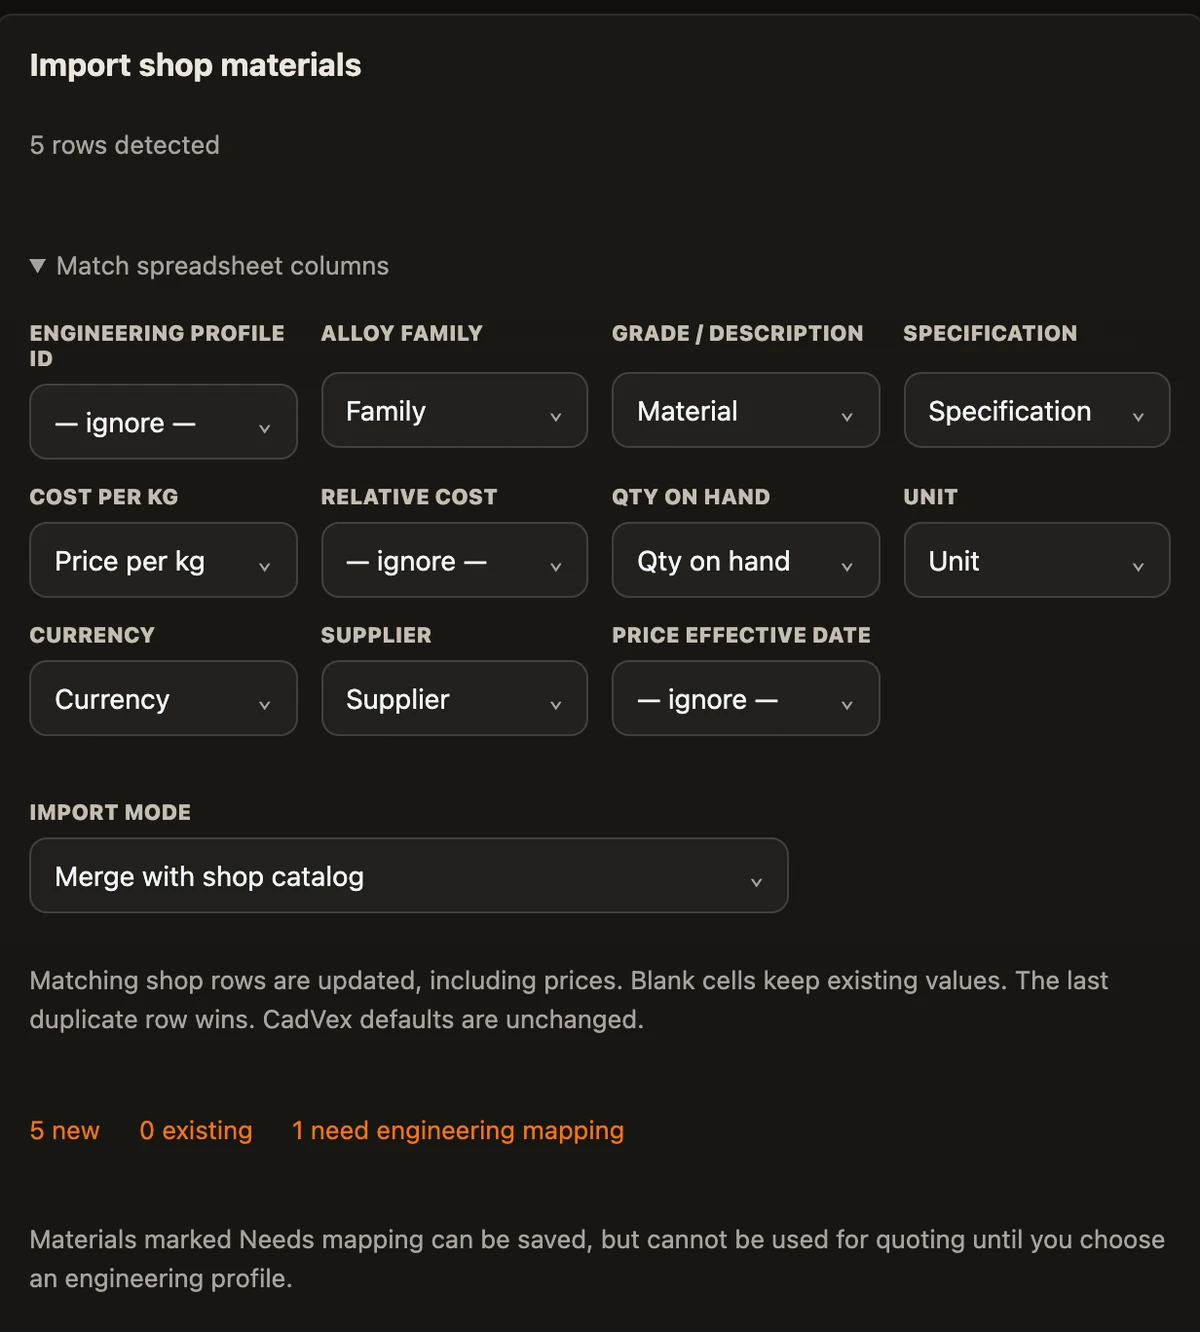
- Click Import shop materials or Import shop stock sizes.
- Click Choose Excel or CSV file and pick an
.xlsxor.csvfile. - In Match spreadsheet columns, tell CadVex which column holds what, for example the material name, grade, cost per kg and supplier, or the stock form and dimensions. Choose — ignore — for columns you do not need.
- Review the rows. CadVex counts new rows, rows that already exist, rows with invalid dimensions and materials that need an engineering profile. Invalid rows are skipped.
- Choose the Import mode:
- Merge updates matching rows (prices included) and adds new ones. Blank cells keep the existing values. If a row appears twice, the last one wins.
- Replace replaces your shop list with the reviewed rows.
- Click Import reviewed rows.
A spreadsheet can be up to 8 MB, with up to 10,000 rows per import, in Cloud and in Desktop. Password-protected workbooks cannot be read.
CadVex's own materials and sizes are never changed by an import. Clear shop list removes your shop entries only.
Markup
Markup is part of the rate profile, in Shop Rates → Markup. There are two:
- Material markup %, for the material you buy,
- General markup %, your general margin.
The low and high range percentages set the band CadVex shows around each estimate. You can also change markup for one part, in the Shop Rate Card step of its Cost Analysis; that change stays in that analysis.
Rates in Settings versus rates in one analysis
This is the most important rule in this chapter:
Settings → Shop Rates
- Applies to every new analysis.
- Does not change analyses you already saved.
Cost Analysis of one part
- Applies to that analysis only.
- Never changes your Settings.
When you start a new analysis, CadVex copies the default rate profile into it. From then on, the analysis has its own copy:
- If you change a rate inside one analysis (in Cost Analysis, step Shop Rate Card), that change stays in that analysis. It is saved with it and is still there when you reopen it. Your Settings do not change, and no other part changes.
- If you change your Settings later, analyses you already saved keep the rates they were saved with. New analyses use the new rates.
- To load a profile into an open analysis, choose it in the Shop Rate Card step and click Apply Profile.
The same goes for the machine ticks in the Shop Rate Card step: they count for this estimate only, until you have saved your machines. After that the step shows the machines the analysis copied from your list, read-only, and your list stays in Settings → Machines.
Quote template
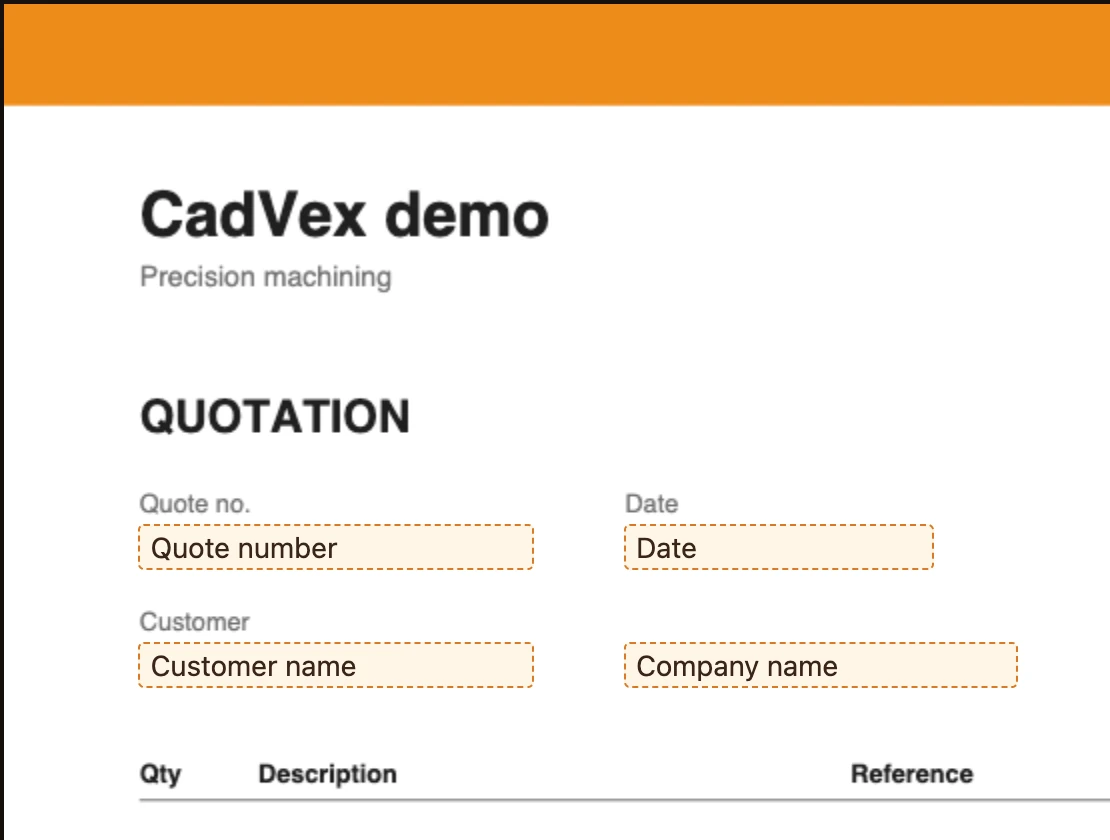
Your quotes print on your own letterhead. Open Settings → Quote Template and follow the six steps:
- Upload PDF: your blank letterhead, as a PDF.
- Place fields: drag the quote number, date, customer and the other fields onto the page.
- Place line items: drag each column onto the first line row, then place the Next row marker to set the row spacing.
- Totals & terms: choose No tax or add a tax rate, and place the totals.
- Test quote: click Generate test quote and check the result.
- Save: click Save Template.
Other pages of your PDF, such as your terms and conditions, are added to every quote unchanged.
- In Cloud, the template PDF must be small (about 3 MB). Only an administrator can change the template.
- In Desktop, the PDF can be up to 15 MB and 25 pages, and the quote number, date and total must be placed. Each saved template is a new version; quotes you already saved keep their PDF.
Team (Cloud)
Open Settings → Team to invite colleagues to your shop.
- Click Invite a member and enter their email.
- Click Send invite, or Copy the invitation link and send it yourself.
You can remove a member or revoke an invitation from the same page. The Free Evaluation includes one administrator and no invited members.
CadVex Desktop is for one user per license and has no Team tab.
Next: Run an analysis.